As an Amazon Associate this site earns from qualifying purchases.
To replace waterdrop g3 p800 filters without leaks on your first attempt, shut off the cold-water inlet valve, unplug the unit, press the filter-life indicator until it blinks, twist the cartridge a quarter-turn counter-clockwise, pull it straight out, then push the new one in and rotate clockwise until the icon on the cartridge lines up with the lock symbol. Wipe the O-rings, restore power, open the inlet slowly, and let the system flush for 15–30 minutes before drinking. The G3 P800 uses tool-free quick-twist cartridges, so leaks almost always come from a missed valve, a pinched O-ring, or skipping the flush cycle.
This guide walks a first-timer through every step, from prep to post-install testing, plus the spare gear worth keeping on hand. If your G3 P800 is more than three years old or you're considering an upgrade alongside the swap, we'll also point you to a few comparable tankless RO systems so you can make an informed call.
Before You Start: What the G3 P800 Filter System Actually Looks Like
The Waterdrop G3P800 Reverse Osmosis System is an 800 GPD tankless reverse osmosis system with three composite filter cartridges visible on the front panel: a CF (sediment + carbon block) pre-filter, an MRO (RO membrane) main filter, and a CB (post carbon) polishing filter. Each one twists in and out without wrenches, plumbers' tape, or disconnecting any waterlines — which is why the G3 series is so popular with renters and first-time DIYers.
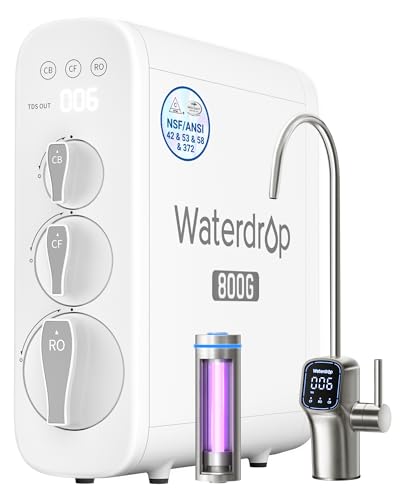
- [10-Stage filtration] Tested by official third-party laboratory (SGS), through 10-stage filtration, G3P800 can effectively reduce PFAS, fluoride, heavy metals like lead, chromium
- [800 GPD high capacity, 3:1 pure to drain ratio] The Waterdrop G3P800 reverse osmosis system offers a higher water capacity (800 gallons per day), thereby meeting demands of a big
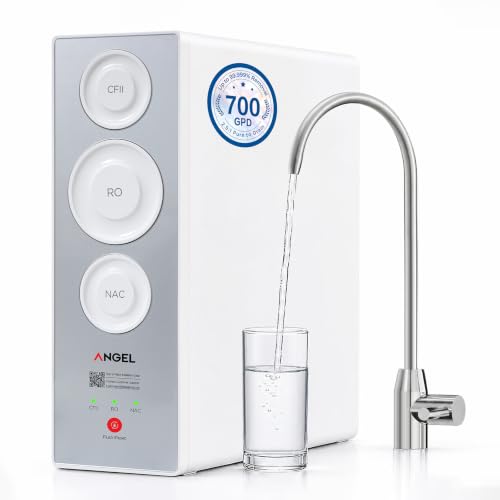
- [TRUSTED CERTIFICATIONS]: ANGEL X2
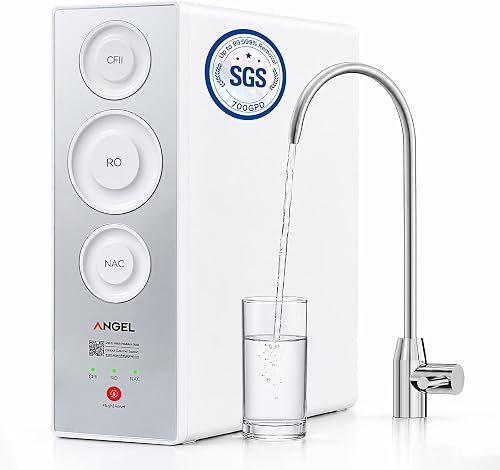
- [UP TO 99% REMOVAL]: This tankless 7-stage filtration system uses a precision 0.0001μm RO membrane and ANGEL APCM technology to reduce >99% of PFAS and chlorine, >99.9% of copper
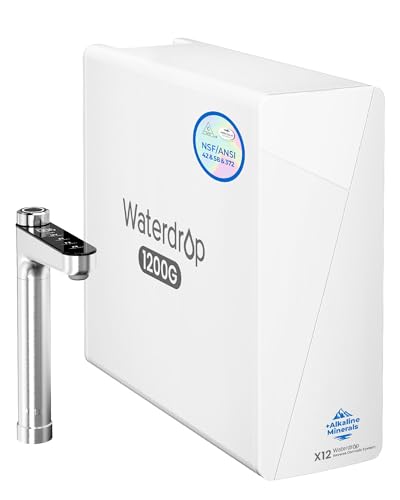
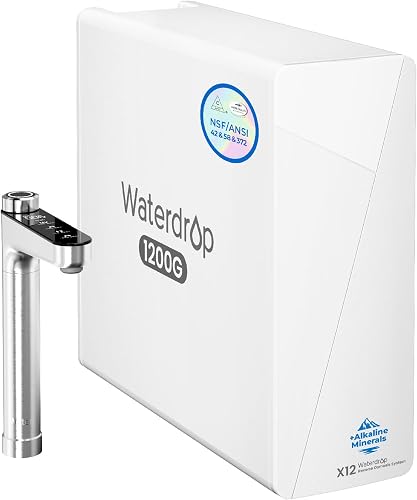
- [Trusted certification] Tested and certified by IAPMO R&T against NSF/ANSI 42 & 58 & 372 standard, and tested by SGS to reduce harmful substances
- [1200 GPD fast filtration] Experience the ultimate upgrade in water purification with our 1200 GPD high-speed tankless reverse osmosis water filter. Designed for family
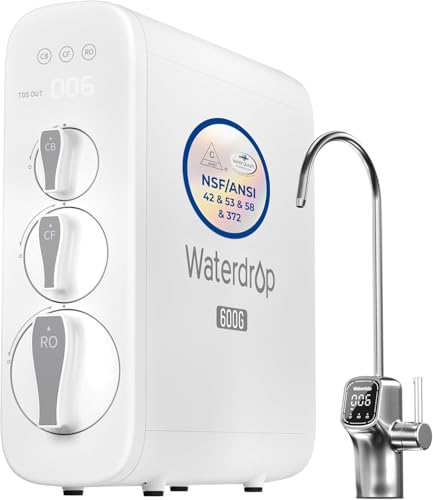
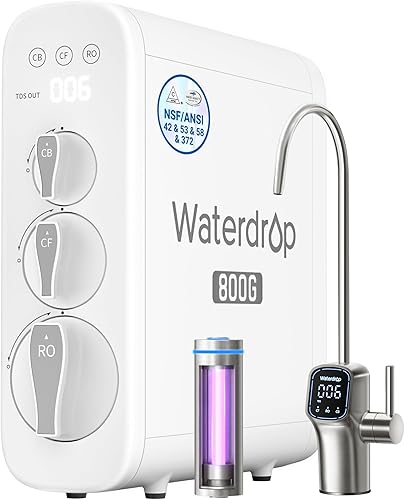
- [Trusted certifications]: Waterdrop G3P600 reverse osmosis system is certified against NSF/ANSI 58 for TDS reduction and NSF/ANSI 372 certified for lead-free material. Also it has
- [8-stage filtration]: Tested by official third-party laboratory (SGS), the reverse osmosis system can effectively reduce TDS, chromium, PFAS, radium, fluoride, arsenic salt, iron
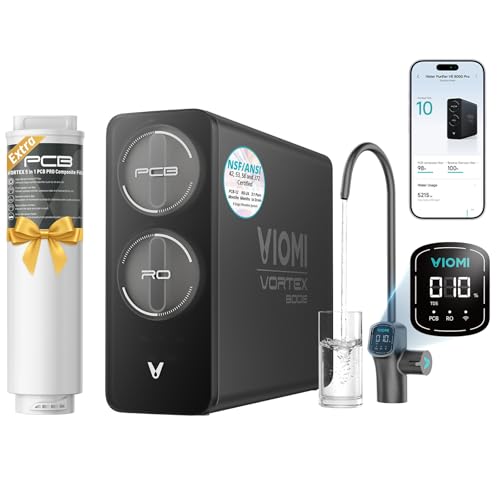
- [Flexible Installation & Refrigerator Compatibility] Need filtered water for your fridge or ice maker? Viomi V8 Pro reverse osmosis water filtration system can supply purified
- [Protecting What Matters Most: Certified Pure Water] The
How the G3 P800 Compares to Other Tankless RO Systems
If your filter swap turned into a cracked housing, or your G3 P800 is past its useful life, here's how it stacks up against other tankless systems with similar capacity and DIY-friendly maintenance.
| System | GPD | Stages | Pure-to-Drain | Cartridge Swap Style |
|---|---|---|---|---|
| Waterdrop G3 P800 | 800 | 7 | 3:1 | Tool-free twist-lock |
| Waterdrop G3P600 | 600 | 8 | 2:1 | Tool-free twist-lock |
| VIOMI V8 Pro | 800 | 9 | 3:1 | Twist-lock |
| Waterdrop X12 | 1200 | 11 | 3:1 | Twist-lock |
| ANGEL X2 | 700 | 5 | 2.5:1 | Twist-lock |
That said, "tool-free" doesn't mean "foolproof." The most common leak points during a cartridge swap aren't on the new filter itself; they're the inlet shut-off valve (which sometimes weeps if it hasn't been cycled in a year), the drain saddle, or the quick-connect fittings on the back of the unit if you bumped them while reaching behind the system.
Tools and Supplies for a Leak-Free Filter Swap
- Replacement CF, MRO, and/or CB cartridge (only swap the ones the indicator says are exhausted)
- Clean microfiber towel
- Small flashlight
- A wide shallow tray or baking pan to catch drips
- Food-grade silicone grease (optional, for stiff O-rings)
- A bucket for the post-install flush
You do not need plumber's tape or a wrench. If you find yourself reaching for either, stop — something is wrong, and forcing it is exactly how first-timers crack a housing or strip the bayonet ridge inside the cartridge bay.
Step-by-Step: Replace Waterdrop G3 P800 Filters Without Leaks
Step 1: Shut off water and power, then depressurize
Locate the inlet shut-off valve under your sink. On most G3 P800 installs, this is the small lever valve on the cold-water line between the angle stop and the unit. Turn it perpendicular to the line. Then unplug the power adapter from the wall. Open your RO faucet on the countertop and let it run until the stream slows to a drip — this releases stored pressure inside the membrane housing so cartridges don't spit at you when you pull them.
Step 2: Press the filter-life indicator
The front panel has three colored icons. The one that's red (or blinking red) is the cartridge you need to swap. Press and hold the corresponding icon for about three seconds; you'll hear the internal valve click closed, which isolates that specific filter housing. This is the single most important step for a leak-free swap — skipping it means the cartridge will be under residual line pressure when you twist it out.
Step 3: Twist out the old cartridge
Place your tray under the cartridge bay. Grip the old cartridge firmly, rotate it about 90° counter-clockwise (look for the unlock icon on the front), and pull it straight out. A small amount of water — maybe a tablespoon — will dribble from the cartridge top. That's normal. If water keeps flowing, your inlet valve isn't fully closed; reseat the old cartridge immediately, recheck the valve, and try again.
Step 4: Inspect and prep the new cartridge
Pull the new cartridge from the packaging and check the two O-rings on the top stem. They should be seated evenly in their grooves with no twists, nicks, or debris. If an O-ring looks dry or stiff, wipe a thin film of food-grade silicone grease around it. Do not use petroleum jelly, cooking oil, or plumber's grease — they degrade NSF-rated rubber over time and are the #1 cause of slow drips weeks after a "successful" swap.
Step 5: Insert and lock
Line up the unlock icon on the cartridge with the unlock icon on the housing. Push it in straight — not at an angle — until it stops. Then rotate clockwise about 90° until the lock icon lines up. You should feel a firm click and slight resistance at the end. If it spins freely past the lock position, the bayonet teeth aren't engaged; pull it out and try again.
Step 6: Restore water and power, then flush
Slowly open the inlet valve — over about 10 seconds, not all at once. A slow open prevents a water hammer that can pop a fitting loose. Plug the unit back in. The pump will start within 30 seconds. Open your RO faucet into a bucket and let it run for 15 minutes if you swapped only the CF or CB, or 30 minutes if you replaced the MRO membrane. This flush removes carbon fines and any preservative coating; if you skip it, the first glass tastes metallic and you'll second-guess your install.
Step 7: Leak check
With the system running, dry the area around the cartridge bay with your towel, then put a fresh towel on the cabinet floor. Wait 30 minutes. Come back. If the towel is dry and the front-panel display shows no error code, you're done — you successfully managed to replace waterdrop g3 p800 filters without leaks on the first try.
What If You See a Leak Anyway?
The most common leak after a cartridge swap on the G3 P800 is a slow weep from the top of the cartridge itself, almost always caused by an O-ring that rolled out of its groove during insertion. Shut the inlet valve, depressurize, pull the cartridge, reseat the O-rings, and reinstall. The second-most-common leak is at the inlet quick-connect at the back of the unit — if you bumped it, pull the blue collet ring forward and push the tubing in another 1/4 inch until it bottoms out, then release the collet.
Waterdrop G3P600 — The Quieter Sibling
If your household doesn't need 800 GPD, the Waterdrop G3P600 Reverse Osmosis System uses the same twist-lock cartridge design and the same filter-swap procedure described above, but runs noticeably quieter at the pump. Same NSF/ANSI 42, 53, 58, and 372 certifications. If you found the swap intimidating and want the smallest possible learning curve next time, the G3P600 is the closest mechanical match.
VIOMI V8 Pro — A Drop-In Replacement at 800 GPD
The VIOMI V8 Pro 800GPD Reverse Osmosis System is the closest functional equivalent to the G3 P800: 800 GPD, 9 stages, 3:1 pure-to-drain, and a smart faucet with TDS readout. The cartridge architecture is similar — quick-twist with O-rings — so anyone who has done a G3 P800 swap will feel at home doing a V8 Pro swap.
Waterdrop X12 — The High-Capacity Upgrade
If you have a family of six or you found yourself waiting for the G3 P800 to keep up at peak demand, the Waterdrop X12 Alkaline Mineral Reverse Osmosis System pushes 1200 GPD across 11 stages, including alkaline remineralization. The cartridge swap process is mechanically identical to the G3 series, so the skills you just learned transfer.
ANGEL X2 — Lean 5-Stage PFAS-Focused Build
For households whose primary concern is PFAS removal rather than flow rate, the ANGEL X2 Tankless Reverse Osmosis Water Filter System tests to NSF/ANSI 58, 42, and 372 with documented 99% PFAS reduction. The 2.5:1 pure-to-drain ratio is slightly less efficient than the G3 P800, but the smaller stage count means fewer cartridges to keep on hand.
How Often Should You Replace Each G3 P800 Cartridge?
Waterdrop's published intervals are 6 months for the CF (sediment + carbon block), 24 months for the MRO membrane, and 12 months for the CB post-carbon. Those numbers assume average municipal water and roughly 4 gallons per day of household demand. If your TDS is above 500, your sediment cartridge runs hot, or your indicator lights flip earlier than expected, trust the indicator over the calendar.
For a deeper dive on stretching cartridge life and keeping flow rates strong, see our RO system maintenance guide and the key features explainer.
Frequently Asked Questions
Why is my Waterdrop G3 P800 leaking from the top after I changed the filter?
The top of the cartridge is sealed by two O-rings on the cartridge stem. A leak there almost always means one of those O-rings rolled out of its groove during insertion, picked up a piece of debris, or was inserted dry. Shut the inlet, depressurize at the faucet, twist out the cartridge, wipe the O-rings clean, apply a thin layer of food-grade silicone grease, and reinstall. Avoid petroleum-based lubricants.
Do I need to turn off the water to change a Waterdrop G3 P800 filter?
Technically the internal valve isolates the cartridge when you press and hold the filter-life icon, so Waterdrop says you don't have to shut the inlet. For a first-time swap, do it anyway. A 10-second valve close is cheap insurance against a stuck internal valve, and it gives you a stress-free workspace.
How long should I flush a new G3 P800 RO filter before drinking?
15 minutes for the CF or CB cartridge, 30 minutes for the MRO membrane. The first flush rinses carbon fines and any factory preservative coating. If you skip it, water tastes metallic or chemical for the first day or two, which has nothing to do with the membrane and everything to do with shortcutting the flush.
Can I use third-party filters in my Waterdrop G3 P800?
The twist-lock geometry on the G3 P800 is proprietary to Waterdrop, so most third-party cartridges sold as "compatible" will not seat correctly and almost guarantee a leak. Stick with genuine Waterdrop CF, MRO, and CB cartridges for this system. If you want a system with open-standard 10-inch housing replacements, the Express Water RO5DX or iSpring RCC7 use universal cartridges instead.
Why is the red indicator still on after I replaced the filter?
The G3 P800 tracks filter life by an internal counter, not by sensing the cartridge itself. After installing a new cartridge, press and hold the corresponding icon for about 5 seconds — past the 3-second isolation click — until you hear a second beep. That resets the counter. If the light stays red after a reset, unplug the unit for 60 seconds and try again.
Is the Waterdrop G3 P800 still worth it in 2026 or should I upgrade?
The G3 P800 remains a strong 800 GPD tankless system, especially for first-timers because the cartridge swap is genuinely simple once you've done it once. Upgrading only makes sense if your household has grown past four people, your inlet TDS exceeds 800, or you want features like instant hot water. See our 2026 under-sink RO buyer's guide for current alternatives.
What's the difference between the CF, MRO, and CB cartridges?
The CF is a composite pre-filter combining sediment removal and granular activated carbon — it protects the membrane from chlorine and silt. The MRO is the reverse osmosis membrane itself, where dissolved solids get rejected. The CB is a post-membrane polishing carbon that improves taste and removes any residual odor before water reaches the faucet. Each has its own indicator and its own replacement interval.
Final Thoughts
A first-time G3 P800 cartridge swap is genuinely a 10-minute job once you understand the sequence: isolate, depressurize, twist out, inspect O-rings, twist in, flush, leak-check. The system is engineered for renters and DIYers, and the leaks people report are almost always from skipping the flush, missing the inlet valve, or insertion at a slight angle. Follow the seven steps above and you'll replace waterdrop g3 p800 filters without leaks reliably from here on out — and you'll have built the muscle memory that transfers to most other tankless RO systems on the market.
Key Takeaways
- Choosing the right replace waterdrop g3 p800 filters without leaks means matching the key features to your specific needs and budget
- Read real customer reviews and check the return policy before you commit
- Also covers: waterdrop g3 p800 filter change tutorial
- Also covers: waterdrop g3 p800 cartridge replacement leak fix
- Also covers: waterdrop g3 p800 filter swap beginner guide
- Compare value across models — the priciest option is not always the best fit